Let me first tell you about the space itself. Our three story home is topped off with a loft-like room which is technically a large bedroom. It has a bathroom, a large walk-in closet, and two large walk-in unfinished attic storage areas. Once you take away the things I've just mentioned you are left with a T-shaped space which is graced on one end by a flight of stairs and on the other end by a set of 3 large windows which overlook our wooded backyard. In total there is about 270 square feet of usable studio space. While it is still not my dream space, it is definitely a vast improvement from the 11 by 10 foot spare bedroom that I previously occupied.
Yesterday I was feeling a little better after a week of being under the weather and I took the opportunity to straighten things up a bit. As I stood back to admire my work I decided I better take some pictures so I could fool everyone into thinking that I was always so neat and tidy.
On to the pictures!
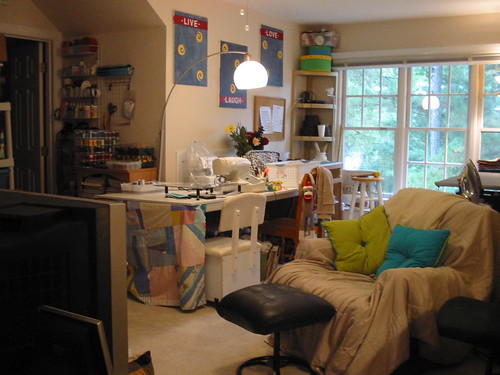 This first shot is what you see when you first get to the top of the stairs. The door that you see on the left leads to the bathroom. To the left of that door (just out of view) is a set of shelves which holds my bins of larger fabric cuts and boxes of office-related material. To the right of the door is a large wire shelf that I installed to organize my glues and sprays and larger notions. To the right of that is a small bookshelf (which I hope to upgrade soon) filled to capacity with craft-related books and magazines. it is topped with my pretty darn impressive thread stash. To the right of that you have the sewing area. My favorite machine is set up and ready to go at all times in front of the white chair, while the machines I use less often kind of hang out by the wall and can be pulled forward to the brown chair work station when they are needed. Under the table I have storage shelves which gives me a lot of room to put things that I don't use that often. The table was "created" by setting up a standard folding table and making it "bigger" by topping it with pieces of melamine (which have the added bonus of making the table less "bouncy" when my machines really start rocking). To the right of that is the cutting station - which is simply an uninstalled kitchen sink base cabinet that I topped with a large piece of melamine and a self-healing mat. I got the base for free because it didn't have doors (oh well) and had a minor scratch (which I could care less about). The height is absolutely perfect for me. In the picture you can also see my super comfy chair, which I spend a lot of time in. It is not pretty enough to leave uncovered, but it is seriously the most comfy chair in the whole world.
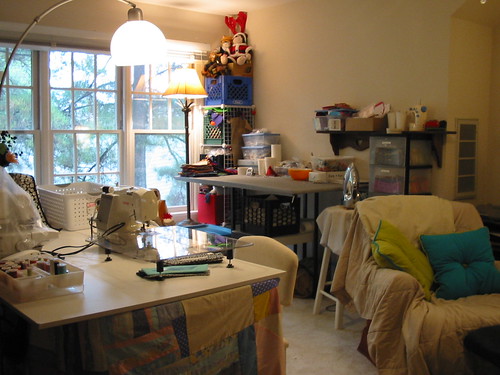 In this next shot you can see the padded surface of my work table. I can iron directly on the table, which is a huge time saver. It is just one of those "pop up tables" that you can get for under $50 if you keep your eyes open for sales at Jo-Ann's. I highly recommend them. Under that table and to the left and right you'll see a variety of storage shelves and bins. Oh, and see that light hanging above the sewing machine? I got it for $15 at Walmart and I have no idea how I lived without it! It is absolutely the way to go if you are in a room where you seem to always be casting a shadow with your head right where you really need the light to be. Speaking of lighting, overhead there is a ceiling fan (which is great) that has a light (which is less than great). Therefore, I was forced to resort to task lighting at each of my work stations. I'm pretty happy overall with the lighting, and during the day the lighting isn't an issue at all since the windows let in so much natural light.
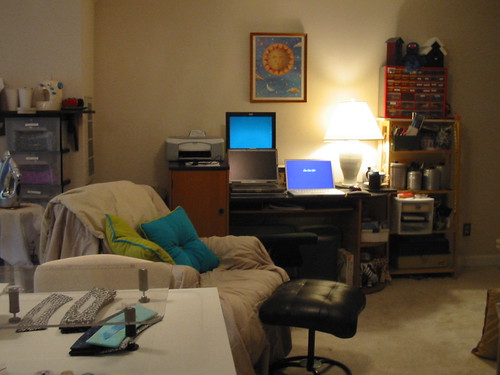 In this third picture you get to see what I call the technology station and the Tower of Terror (the precariously piled shelving solutions that were never meant to work together). Yes, you do see 2 laptops AND an extra monitor. I'm in the process of breaking in my new laptop and I still have to refer back to the old one (which has a burned out backlight and only works if you hook it up to a separate monitor) to find things I forgot to move over to the new computer. It is a painful process, and takes up WAY too much room on the desk.
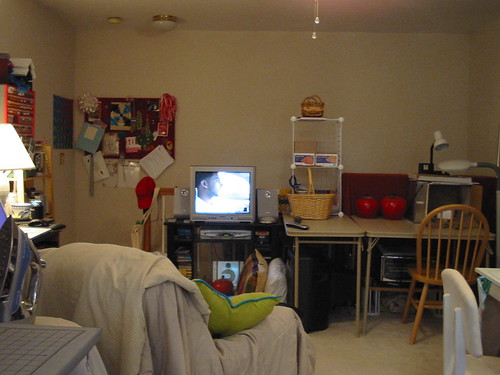 And finally we have a shot looking back where we started. The stairs exit down on the left. To the right of that you can see the very necessary TV/DVR/stereo area (when you spend as much time as I do in this room you need some noise to keep you company). And then to the right of that you see my packaging and photographing area (my super fab light box that I made for free over a year ago is still doing its job just fine!).
So that is a tour of my studio. It is a mish-mash of random things that I've managed to pile up, repurpose, and arrange into a space that functions - even though it will never make the cover of "Glamorous Studios" magazine. My husband says that if I had a refrigerator up here I'd probably never come downstairs, but that isn't true - the dog needs to go for a walk every now and then and so far I haven't figured out a way to do that from the third floor.

1 comment:
Awesome space. Thanks for the tour!
Post a Comment